Bicycle Tire Will Not Seat On Rim: Easy Fixes
If your bicycle tire will not seat on the rim, stop inflating it and check the tire and rim sizes first. A size mismatch, trapped tube, misplaced rim tape, or dry, tight bead can keep a tire from sitting evenly. In the United States, compare the numbers on the tire and rim—not just labels such as “700c” or “29-inch”—then refit the tire and inflate it only within the limits set by the tire and rim makers.

Quick answer: What should you check first?
First, confirm that the tire and rim have the same bead-seat diameter, then look for a trapped tube, damaged parts, or a bead stuck outside the rim’s center channel. Do not keep adding air to a tire that looks uneven or bulged.
Check these items in order:
- Match the size. Compare the ISO size printed on the tire and rim, such as 37-622. The second number, 622, is the bead-seat diameter. It must match.
- Check for damage. Look for a bent rim, frayed tire bead, torn rim tape, or a tire casing that has split or gone lumpy.
- Refit the tire. Let out all the air. Work the bead into the rim’s center channel, where it has more room to move.
- Check the tube, if fitted. Make sure no part of the tube is pinched between the tire bead and rim.
- Inflate in stages. Use a pump and inspect both sides as air goes in. Stop if the tire bulges, the bead rises unevenly, or you hear a sharp, unusual bang.
A tire can be tight and still be the correct size. But if the sizes do not match, or the bead is damaged, more force will not make the setup safe.

Why a bicycle tire may not seat on the rim
A tire seats when its bead—the reinforced edge that holds the tire on the wheel—rests evenly in the rim’s bead seat. If one part of the bead stays too low or rises too high, the tire may look lopsided or form a bulge.
The most common causes are:
- Wrong size: The tire’s bead-seat diameter does not match the rim.
- Bead stuck in the rim’s center channel: The tire has not moved up evenly onto the rim’s bead seat.
- Tube caught under the bead: A trapped tube can hold the bead out or get pinched.
- Rim tape or valve in the way: Tape that is too wide, folded, or out of place can block the bead. A valve stem that sticks out too far can also make fitting harder.
- Tight tire and rim fit: Small differences in tire and rim dimensions can make some combinations harder to install, even when the sizes match.
- Damage or incompatibility: A damaged bead or rim, or a tire not approved for a hookless rim, can prevent a safe fit.
Read the size, not just the label
A tire marked 700c and one marked 29-inch may both use a 622 mm bead-seat diameter, but that does not mean every tire will fit every rim. Check the full ISO size on the sidewall and compare it with the rim’s stated size. The first number is the tire’s nominal width in millimeters; the second is the bead-seat diameter.
The tire’s width must also be suitable for the rim’s internal width. Check the tire and rim makers’ approved size ranges. Do not assume that a matching diameter alone makes a tire-and-rim combination suitable.
Check whether the rim is hookless
Some rims have no inward-facing hook at the top of the sidewall. These are called hookless rims. They require tires approved for that rim type, and the makers may set limits on tire width and inflation pressure.
Do not try to make an unapproved tire fit by using more pressure or a tool. Check the tire and rim manuals for compatibility and pressure limits. If either maker’s instructions are unclear, ask a bike shop before riding.
How to reseat the tire safely
Use this process for a tire that appears compatible and has no visible damage. Work with the wheel off the bike if that makes it easier to see both sides.
- Let all air out. If the tire has a tube, remove the valve cap and fully deflate it. For a tubeless tire, follow the maker’s instructions for handling sealant; it can spill when the tire comes off.
- Inspect the tire and wheel. Check the tire bead for cuts, fraying, or a section that looks stretched. Look for dents in the rim and for rim tape that is loose, folded, or covering the bead seat.
- Move the bead into the center channel. The channel in the middle of the rim is usually deeper than the outer bead seat. Push both tire beads toward it around the whole wheel. This gives the tire more room to fit.
- Check the tube and valve, if present. Add just enough air to give the tube a soft shape. It should not be twisted or tucked under the tire bead. Push the valve stem slightly into the tire, then check that the bead sits beside—not on top of—the tube.
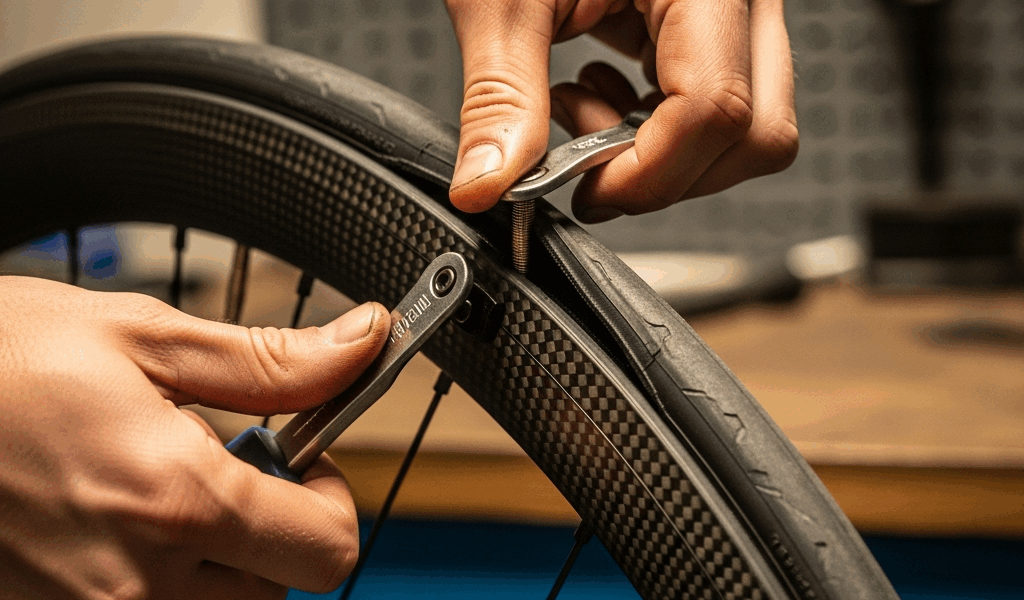
- Fit the tire by hand where possible. Start opposite the valve and work toward it. Keep the part already fitted down in the center channel. If you use a tire lever, use a plastic lever and take care not to pinch the tube or damage the rim tape.
- Use a suitable lubricant if the bead is dry and tight. A small amount of water with mild soap or a tire-mounting fluid approved by the tire or rim maker may help the bead move. Keep lubricant away from brake rotors, rim-brake tracks, and pads. Do not use oil, grease, or household solvents.
- Inflate slowly and inspect both sides. Add air in small steps. Look around the full tire on both sides to see whether it is rising evenly. Stay within the lowest pressure limit that applies to the tire, rim, and setup.
Many tires have a thin molded line near the bead. When the tire is seated, that line should run at a steady distance from the rim edge. If it dips under the rim or rises sharply in one spot, stop, let the air out, and refit that section.
For a tubeless tire, follow the tire, rim, and sealant instructions. Some setups are easier to seat before sealant is added. A pump with a boost chamber or a regulated air source may help when the maker permits it, but do not use an unregulated compressor or exceed the stated pressure limit.
Symptoms, likely causes, and next steps
Use the table to narrow down the problem. If you see damage or a bulge, do not ride the wheel until the cause is fixed.
| What you see | Possible cause | What to do |
|---|---|---|
| One section of tire sits low | Bead is stuck in the center channel, or a tube is caught | Deflate fully, move the bead into the center channel, and check the tube |
| Tire rises high in one spot | Bead is not seated evenly, or the tire is damaged | Deflate and inspect; replace a damaged tire |
| Tire will not go over the rim | Bead is tight, or tire and rim are incompatible | Recheck the full size and approved fit range; do not force it |
| Tire bulges as you inflate | Tube may be trapped, bead may be damaged, or tire may be incompatible | Stop inflating at once, deflate, and inspect |
| Tire holds air but looks wobbly | Bead may not sit evenly, or the tire casing may be damaged | Check the molded line and inspect the casing |
| Tubeless tire leaks air at the edge | Bead may not be seated, or tape or valve may leak | Check the bead, tape, valve, and maker’s tubeless instructions |
| Valve area will not sit right | Valve may be tilted, or tube may be under the bead | Deflate, push the valve into the tire, and refit the bead |

Mistakes that can damage a tire or rim
More pressure is not a safe fix for a bead that is out of place. Too much air can damage the tire or rim, and an incompatible setup may fail even if it appears to hold air.
Avoid these common mistakes:
- Do not inflate past a limit. Follow the tire and rim makers’ pressure limits and any limits for the specific tire-and-rim combination. If the stated limits differ, use the lower limit.
- Do not use a metal tool to force the bead. It can cut the tire, damage the rim, or pinch a tube. A lever is for careful fitting, not for forcing an incompatible tire.
- Do not use flammable sprays to seat a tire. Ignition methods can cause burns, fires, and equipment damage.
- Do not ride on a bulge or an uneven bead. A tire that is not seated evenly may shift or come off the rim.
- Do not assume “tubeless ready” means universally compatible. Check the exact tire and rim instructions, including hookless rules where relevant.

When to stop and ask a bike shop
Get help from a bike shop if the tire and rim sizes do not match, the bead or rim is damaged, or the tire still will not seat after careful refitting. Ask for help if you cannot confirm that a tire is approved for a hookless rim.
A shop can also check whether the tire width suits the rim, whether the rim tape is the right type and width, and whether the wheel itself is damaged. If a tire has a cut bead, a bulge, or a casing that has come apart, replacing it is usually safer than trying to repair the bead.

FAQs
Can I ride with a tire that is not fully seated?
No. If any section sits unevenly, bulges, or does not follow the rim evenly, do not ride it. Deflate the tire and fix the fit first; replace damaged parts.
Why does a new tire feel much harder to fit?
Some new tires have a snug fit, and some tire-and-rim pairs are tighter than others. Check that the sizes and approved width range match, then use the rim’s center channel to make fitting easier. Do not stretch the bead with excessive force.
Can I use a tire lever to seat the bead?
A plastic tire lever can help fit a tight tire, but use it carefully. It should not trap a tube, cut the tire, or damage rim tape. Do not use a lever to force a tire that is the wrong size or not approved for the rim.
Why does a tubeless tire lose air at the rim?
Air can escape if the bead is not seated, the rim tape is damaged or misplaced, or the valve does not seal. Check each part against the maker’s setup instructions. If the tire or rim is damaged or incompatible, stop and have it checked.
Should I add sealant before seating a tubeless tire?
Follow the instructions for your specific tire, rim, and sealant. Some setups are easier to seat before adding sealant, which can reduce mess if the tire comes off. Other instructions may differ, so do not treat one method as right for every system.
Conclusion
If your bicycle tire will not seat on the rim, start with the size match, then check for damage, trapped tube, rim-tape problems, and a bead stuck in the center channel. Refit it carefully and inflate in stages while watching both sides of the wheel. If the fit still looks wrong, or the tire and rim may not be compatible, stop and get help before riding.