How To Pump Air Into A Bicycle Tire: Easy Beginner Guide

Learn how to pump air into a bicycle tire with simple steps for Presta and Schrader valves. Get the right pressure and ride with confidence.
To pump air into a bicycle tire before a ride on a U.S. street, bike path, or trail, identify the valve, attach a pump that fits, and inflate to the right pressure. Check the gauge as you pump. Then remove the pump, close the valve if needed, and check that the tire sits evenly on the rim.
Most bike pumps sold in the United States work with Presta valves, Schrader valves, or both. Tire pressure is often shown in pounds per square inch, or PSI. Use the guidance for your tire and wheel—not the tire’s maximum pressure as a default target.

What You Need Before You Start
You need a bike pump with the right valve fitting, a pressure gauge, and a sound tire and wheel. A floor pump with a gauge is a good choice for home use. A small hand pump works for roadside top-ups, though it may take more strokes.
Have these items ready:
- A compatible bike pump: Check which valves its head supports.
- A pressure gauge: This may be built into the pump or used on its own.
- Your tire and wheel pressure guidance: Check the sidewall and the maker’s instructions.
- A Presta adapter, if needed: This lets many Schrader pump heads fit a Presta valve.
Before adding air, look for cracks, cuts, bulges, exposed cords, or a loose tire edge. Check that the valve is straight and the rim has no clear damage.
Do not inflate a damaged tire or wheel to riding pressure. If the tire is partly off the rim, stop and fix the fit first. Get help from a bike shop if you cannot tell whether the setup is safe.
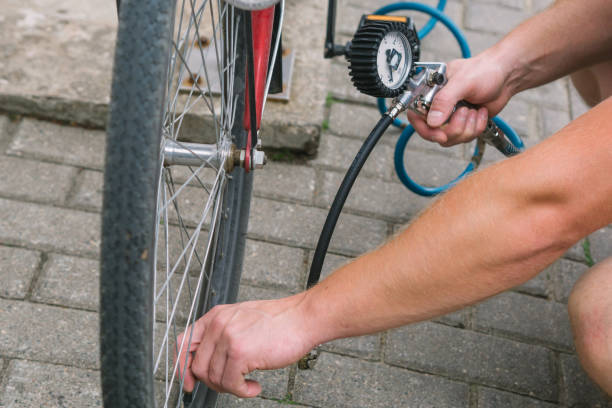
Identify Your Bike Tire Valve
The valve tells you which pump fitting to use and whether you need to open it before pumping. Remove the dust cap, if fitted, and compare the valve with this table.
| Valve type | What it looks like | What to do before pumping |
|---|---|---|
| Schrader | Wide stem with a small pin in the center, like a car tire valve | Remove the dust cap; leave the valve core in place |
| Presta | Narrow stem with a small threaded nut at the tip | Remove the cap, then loosen the small tip nut |
| Dunlop/Woods | Wider base with a distinct upper valve assembly; less common on U.S. bikes | Check the valve and pump instructions for the right fitting |
How to open a Presta valve
Turn the small nut at the very tip counterclockwise until it stops. The nut normally stays on the valve. Briefly press the tip; a short hiss confirms that it can open if the tire still has air.
Do not confuse this tip nut with the larger ring that may sit against the rim. The ring at the rim does not open the valve.
How to choose the right pump setting
Some pumps have two marked holes. Others use a reversible insert or a single head that fits both common valve types. Check the markings or pump manual rather than guessing from the lever position.
If you use a Presta-to-Schrader adapter, open the Presta tip first. Thread the adapter on gently, then attach the Schrader pump head.
Find the Correct Bike Tire Pressure
Choose a starting pressure from the tire and wheel maker’s guidance, then account for rider weight, load, tire width, and surface. Never exceed the lower applicable limit for the tire or rim.
A sidewall number may be a maximum, a permitted range, or other guidance. Read the wording beside it. If a minimum is specified, follow that limit too.
The maximum is a ceiling, not a goal. Like a load limit on a shelf, it tells you what not to exceed—not what you should aim for each time.
| Factor | How it affects pressure choice |
|---|---|
| More rider or cargo weight | Often calls for more pressure within approved limits |
| Wider tires | Often use less pressure than narrow tires under a similar load |
| Rough surfaces | May favor less pressure for grip and comfort, within safe limits |
| Inner tubes | Too little pressure can let the tube get pinched against the rim |
| Tubeless tires | Too little pressure can cause rim strikes or air loss at the tire edge |
| Front versus rear load | The rear tire may need more pressure if it carries more weight |
Hypothetical example: A tire allows up to 80 PSI, but its rim allows only 65 PSI for that tire size. The setup must not exceed 65 PSI. That does not mean 65 PSI is the right riding pressure.
For hookless rims—rims without a hooked inner edge—check the exact approved tire sizes, tire types, and pressure limits. A tire that holds air is not proof of a safe match.
If the tire and rim guidance conflicts, do not guess. Ask the maker or a qualified bike mechanic to confirm the setup.

How to Pump Air Into a Bicycle Tire in 7 Steps
Inflate the tire in small stages, with a firm pump connection and frequent gauge checks. These steps apply to most bikes with inner tubes and to tubeless tires that are already seated and holding air.
1. Put the bike in a stable position
Stand the bike securely so it cannot roll or fall. Turn the wheel until you can reach the valve without pulling the pump hose tight.
Keep the hose clear of brake rotors, spokes, and other moving parts.
2. Remove the cap and prepare the valve
For a Schrader valve, remove the dust cap. There is no tip nut to loosen.
For a Presta valve, remove the cap, loosen the small tip nut, and briefly press the tip. Do not unscrew the valve core.
3. Attach the pump head
Fit the head squarely over the valve or thread it on, as the pump requires. Engage the locking lever if the head has one.
The head should seal without constant hissing. Keep the valve straight; side force can bend a Presta tip or damage the tube where the stem joins it.
4. Add a few strokes and check the seal
Pump slowly at first. Watch for a rising gauge reading and feel for the tire becoming firmer.
If air hisses at the head, stop and refit it. If the handle becomes very hard to push but the tire stays soft, the head may not be opening the valve. Check the fitting before applying more force.
5. Pump to your chosen pressure
Use smooth, full strokes. Pause to read the gauge as you approach the target.
For a tire that was fully flat, add only a little air at first. Check both sides to make sure the tire edge sits evenly on the rim and no tube is trapped beneath it.
The bead is the reinforced edge that holds the tire on the rim. Many tires have a fine molded line near that edge. Its distance from the rim should look even around the wheel.
Stop at once if you see a bulge, an exposed tube, or an uneven bead. Release the air before you try to correct the fit.
6. Remove the pump and close the valve
Release the pump head or unscrew it while keeping the valve straight. A short hiss may be air leaving the hose, not the tire.
On a Presta valve, turn the small tip nut clockwise until finger-tight. Do not use pliers. Replace the dust cap if you have one.
With a threaded pump head, watch for the removable Presta valve core turning loose as you disconnect it. If air keeps escaping, check the core before you ride.
7. Check the tire before riding
Inspect both sides of the tire, then spin the wheel slowly. Look for a new bulge, an uneven tire edge, or a tire that rubs the frame.
A successful inflation means:
- The tire reaches the chosen pressure.
- The bead sits evenly around the rim.
- The valve does not keep leaking.
- The tire stays firm during the check.
If the wheel wobbles or the tire looks misshapen, find the cause before riding.

What to Do If the Tire Will Not Inflate
Start with the pump connection and valve. These checks are quick and can prevent needless tube removal. Move on to leak checks only after the pump is attached and set up correctly.
| Symptom | Possible cause | First check |
|---|---|---|
| Air hisses around the pump head | Poor seal or wrong fitting | Remove and refit the correct head |
| Pump handle is hard to push, but tire stays soft | Closed Presta valve, blocked valve, or wrong head setup | Open the Presta tip and check the pump instructions |
| Gauge rises sharply after one stroke | Air may be trapped in the hose rather than entering the tire | Check that the head opens the valve |
| Tire inflates, then goes flat | Puncture, valve leak, or tubeless seal leak | Listen for air loss and check with soapy water |
| Air escapes after a threaded head comes off | Loose removable valve core | Check and snug the core with the correct tool |
| Tire develops a bulge | Poor seating, trapped tube, or casing damage | Stop and release the air |
If a tire with an inner tube keeps going flat
Remove the tube and find the leak. Check the tire for glass, thorns, or other sharp objects before fitting a patched or new tube.
Inspect the inside with care; a sharp object can cut your hand. Also check the rim tape, which shields the tube from spoke holes and sharp surfaces inside the rim.
Adding more air will not fix a puncture. Repeated flats need a cause check, not just another tube.
If a tubeless tire will not hold air
Check the valve, tire edge, rim tape, and sealant as directed by the wheel and tire makers. Small leaks may be sealed by the correct sealant, but sealant does not fix every cut or fit problem.
A fully unseated tubeless tire may need more airflow than a basic floor pump can supply. This is a setup task, not a routine top-up. Do not exceed any tire, rim, pump, or seating-pressure limit to force it into place.
Seek shop help if the tire will not seat within its stated limits.

Common Bicycle Tire Inflation Mistakes to Avoid
The most useful habits are simple: use a gauge, respect the full wheel-and-tire limits, and stop when something looks wrong.
- Treating maximum PSI as the target: More pressure is not always better. It can make the ride harsh and reduce grip on rough ground.
- Relying only on a thumb squeeze: Tire width and casing stiffness affect how firm a tire feels. A gauge gives a more useful reading.
- Using the wrong pump fitting: A poor fit can leak air or damage the valve.
- Bending the valve while pumping: Support a hand pump so it does not rock the stem with each stroke.
- Ignoring a crooked tube valve: Deflate and check it. A tilted stem can signal that the tube or tire has shifted.
- Riding on a very soft tire: This can harm the tire or rim and raise the risk of a pinch flat.
- Adding pressure to fix a bulge: Deflate and inspect instead.
You do not need equal front and rear pressure in every case. You do need each tire’s pressure to suit its load and stay within the approved limits.

Frequently Asked Questions
How often should I check bike tire pressure?
Check pressure before a ride, especially after the bike has sat unused. Tires lose air over time, but the rate varies with the tube, valve, tire, and tubeless setup.
A repeat drop over a short time deserves a leak check. Do not assume it is normal air loss.
Can I use a gas station air pump on a bike tire?
It may fit a Schrader valve, or a Presta valve with an adapter, but a bike pump with a gauge gives more control. Gas station equipment can add air fast, and some systems may not suit low-volume bike tires or the pressure required.
A compatible fitting alone does not make the setup suitable. Use a bike pump when possible.
Can I inflate a bike tire without a pressure gauge?
You can add air with a compatible pump, but a hand squeeze cannot confirm the pressure or prove that it is within limits. Check with a gauge before normal riding.
This matters most when the safe pressure range is narrow or the wheel has a strict pressure cap.
Can I use a CO₂ inflator instead of a pump?
Yes, if the inflator fits the valve and the cartridge suits the tire’s volume and pressure needs. Follow the inflator instructions; discharged cartridges can become very cold.
Check compatibility with tubeless sealant, since some makers specify limits or follow-up steps. Recheck the tire later rather than assuming it will hold the same pressure.
Is it safe to inflate a tire that has been flat for months?
Inspect it first. Long storage alone does not prove that the tire is ruined, but cracks, hard or damaged rubber, bead damage, and rim corrosion need attention.
If the bike was ridden while flat, check for damage to the tube, tire, and rim before adding riding pressure.
Conclusion
Match the pump to the valve, choose a pressure that fits the tire and wheel guidance, and add air while watching the gauge. Check that the tire sits evenly and holds pressure before you ride.
Your next step: Read the valve type and pressure markings on your bike. If the limits are unclear—or the tire bulges, leaks, or will not seat—stop and have a bike shop check it.
Evidence, Research Limits, and Next-Question Map
This guide is a practical synthesis, not a hands-on pump test. Live browsing was unavailable, so current competing pages, search features, and model-specific manuals were not inspected. No current search rankings, verified competitor gaps, or measured search demand are claimed.
For setup-specific checks, consult your pump manual and the exact tire and wheel instructions. Useful technical references include:
- Park Tool: Tire and Tube Removal and Installation
- Schwalbe: Air Pressure Technical FAQ
- Schwalbe: Tubeless Technical FAQ
These links are provided for further reading; their current page contents were not live-verified for this draft.
The map below records inferred reader needs, not observed search demand. Competitor coverage is NOT CHECKED in each case.
| Next question | Reader stage and basis | Reader benefit | Evidence needed for a specific setup | Priority and placement |
|---|---|---|---|---|
| Which pressure limit applies if tire and rim differ? | Before pumping; inferred safety need | Helps prevent overinflation | Exact tire and rim manuals | High; pressure section |
| Why is the pump hard to push while the tire stays flat? | During pumping; inferred failure mode | Prompts a valve and head check before force is used | Pump instructions and valve design | High; troubleshooting |
| Why does a tubeless tire stay flat despite pumping? | During pumping; inferred setup need | Separates a top-up from a seating or leak repair | Tire, rim, and sealant instructions | High; troubleshooting |
| When does repeated pressure loss need repair? | After pumping; inferred maintenance need | Helps distinguish a leak from routine air loss | Leak inspection and component guidance | High; troubleshooting and FAQs |
No site map was supplied. This article is structured as a standalone how-to guide; parent and neighboring pages have not been inferred.